There is a crop function in PIL to crop the image if you know the crop area coordinates. How would you crop the central region of Image if you want certain fraction of Image shape to be cropped
In this post we would use PIL, tensorflow, numpy in a Google colab notebook and learn how to crop the images at center when you actually don’t know the crop image dimesions but just the fraction of image size to crop
We will follow these steps here:
- PIL(python imaging library) to crop a fraction(70%) of Image at center
- tensorflow image central_crop() to crop a fraction(70%) of Image at center
- Read image using opencv and slice the image ndarray to crop it
Let’s get started
First we will start a google colab notebook in our google drive and upload the test image “workplace.jpg”

Use PIL to crop the Image at centerPermalink
We will use the PIL Image.open() function to open and identify our test image
from PIL import Image
import matplotlib.pyplot as plt

img=Image.open('./workplace.jpg')
Next, we want to crop 70% of size of image , so we will calculate the following four coordinates for our cropped image: left, upper, right and bottom. The left and right are the left nost and right most x-coordinate of the image and the right can also be represented as (left+width) and lower can be represented as (upper+height)
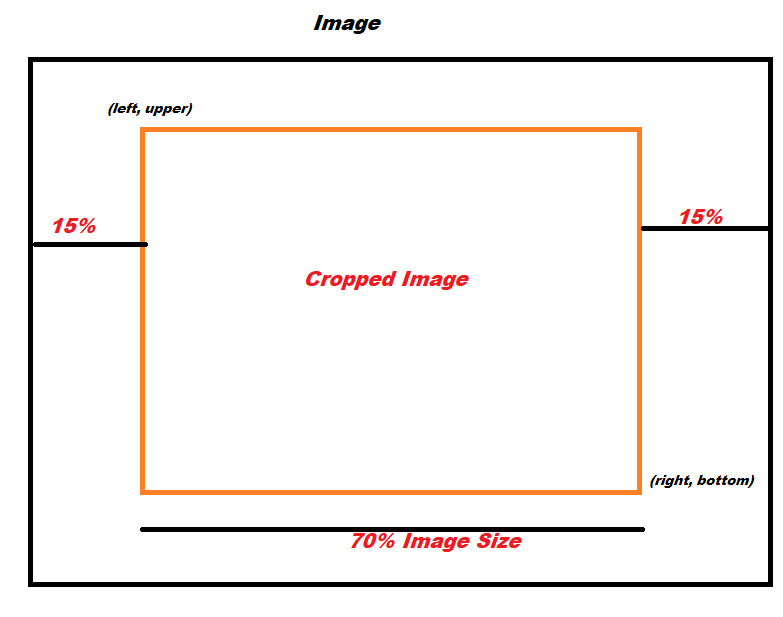
The fraction(70%) of image to be cropped from center is given by variable frac
frac = 0.70

left = img.size[0]*((1-frac)/2)
upper = img.size[1]*((1-frac)/2)
right = img.size[0]-((1-frac)/2)*img.size[0]
bottom = img.size[1]-((1-frac)/2)*img.size[1]
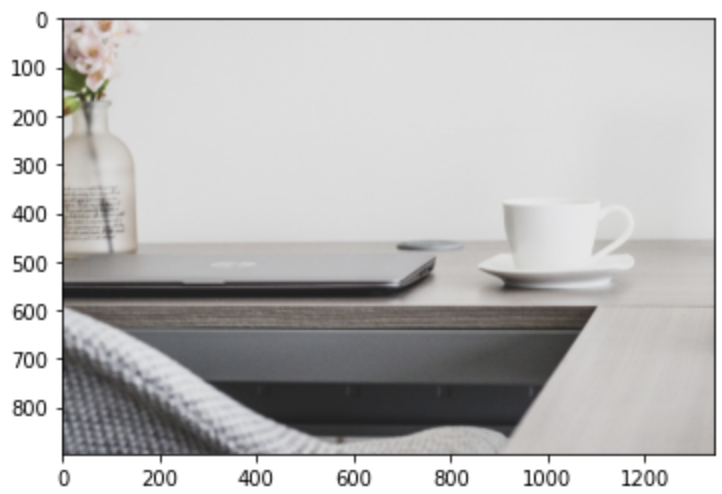
Now we know the coordinates of our cropped image, so we will pass these parameters in the PIL Image.crop() function to get the cropped image from the center
cropped_img = img.crop((left, upper, right, bottom))
Here is the full code for cropping the 70% size of Image from the center
img=Image.open('./workplace.jpg')
frac = 0.70
left = img.size[0]*((1-frac)/2)
upper = img.size[1]*((1-frac)/2)
right = img.size[0]-((1-frac)/2)*img.size[0]
bottom = img.size[1]-((1-frac)/2)*img.size[1]
cropped_img = img.crop((left, upper, right, bottom))
plt.imshow(cropped_img)
Use Tensorflow Image module to crop the Image at centerPermalink
Tensorflow tf.image module contains various functions for image processing and decoding-encoding Ops
First, import the critical libraries and packages, Please note the tensorflow and other datascience packages comes pre-installed in a google colab notebook
import tensorflow as tf
import matplotlib.pyplot as plt
import cv2
Read the image using opencv, which returns the Image ndarray
img = cv2.imread('workplace.jpg')
Now, we will use tf.image.central_crop() function to crop the central region of the image. The central_fraction param is set to 0.7
cropped_img = tf.image.central_crop(img, central_fraction=0.7)
Here is the full code and the cropped image shown below:
import matplotlib.pyplot as plt
img = cv2.imread('workplace.jpg')
cropped_img = tf.image.central_crop(img, central_fraction=0.7)
plt.imshow(cropped_img)
Use Opencv and Numpy to crop the Image at centerPermalink
In this section, we will use numpy to crop the image from the center
import numpy as np
import matplotlib.pyplot as plt
import cv2
First read the image using opencv
img=cv2.imread('./workplace.jpg')
Then find the coordinates of the cropped image, i.e. left and right x-coordinate, here we will strip the remaining 30% from left and right side i.e. 15% (frac/2) from each side
frac = 0.70
y,x,c = img.shape
left = math.ceil(x-(((1-frac)/2)*x))
right = math.ceil(y-(((1-frac)/2)*y))
Next, we will slice the Image array as shown below to get the 70% of cropped Image from the central region
cropped_img = img[math.ceil(((1-frac)/2)*y):starty, math.ceil(((1-frac)/2)*x):startx]
Here is the full code and the cropped image shown below:
img=cv2.imread('./workplace.jpg')
frac = 0.70
y,x,c = img.shape
startx = math.ceil(x-(((1-frac)/2)*x))
starty = math.ceil(y-(((1-frac)/2)*y))
cropped_img = img[math.ceil(((1-frac)/2)*y):starty, math.ceil(((1-frac)/2)*x):startx]
plt.imshow(cropped_img)
Conclusion:Permalink
- PIL Image.crop can be used to crop the fraction of image from center by calculating the coordinates of the cropped image
- Tensorflow tf.image.central_crop() function can be used to crop the central region of an Image by providing the fraction of Image size to be cropped
- Numpy and Opencv can be also used to crop the image from center by appropriately computing the coordinates of cropped image using the fraction of Image size






No comments:
Post a Comment